
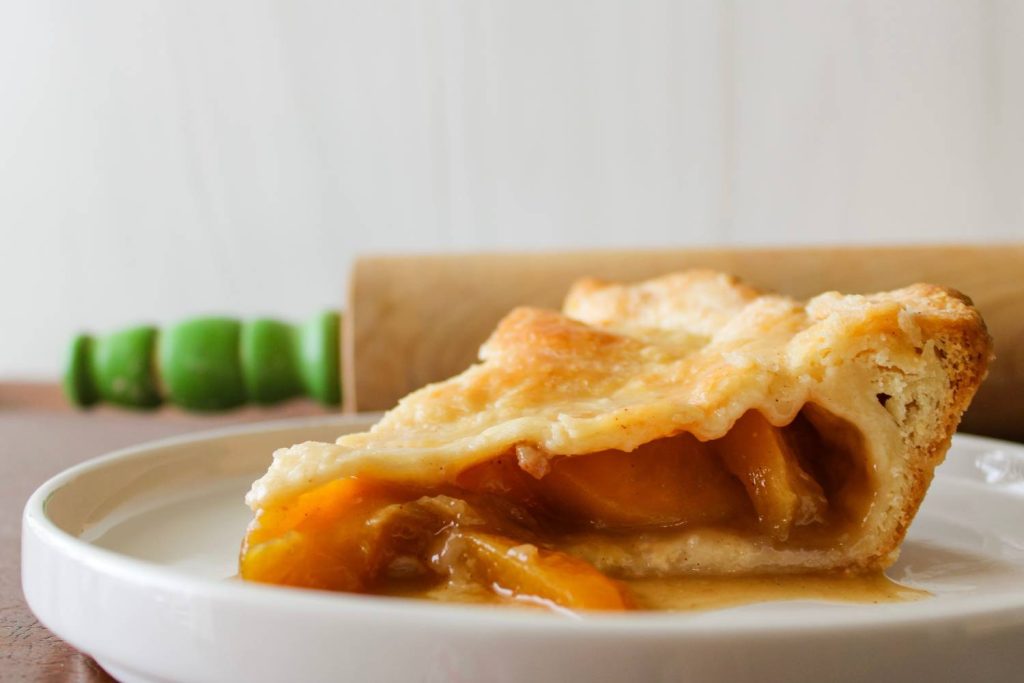
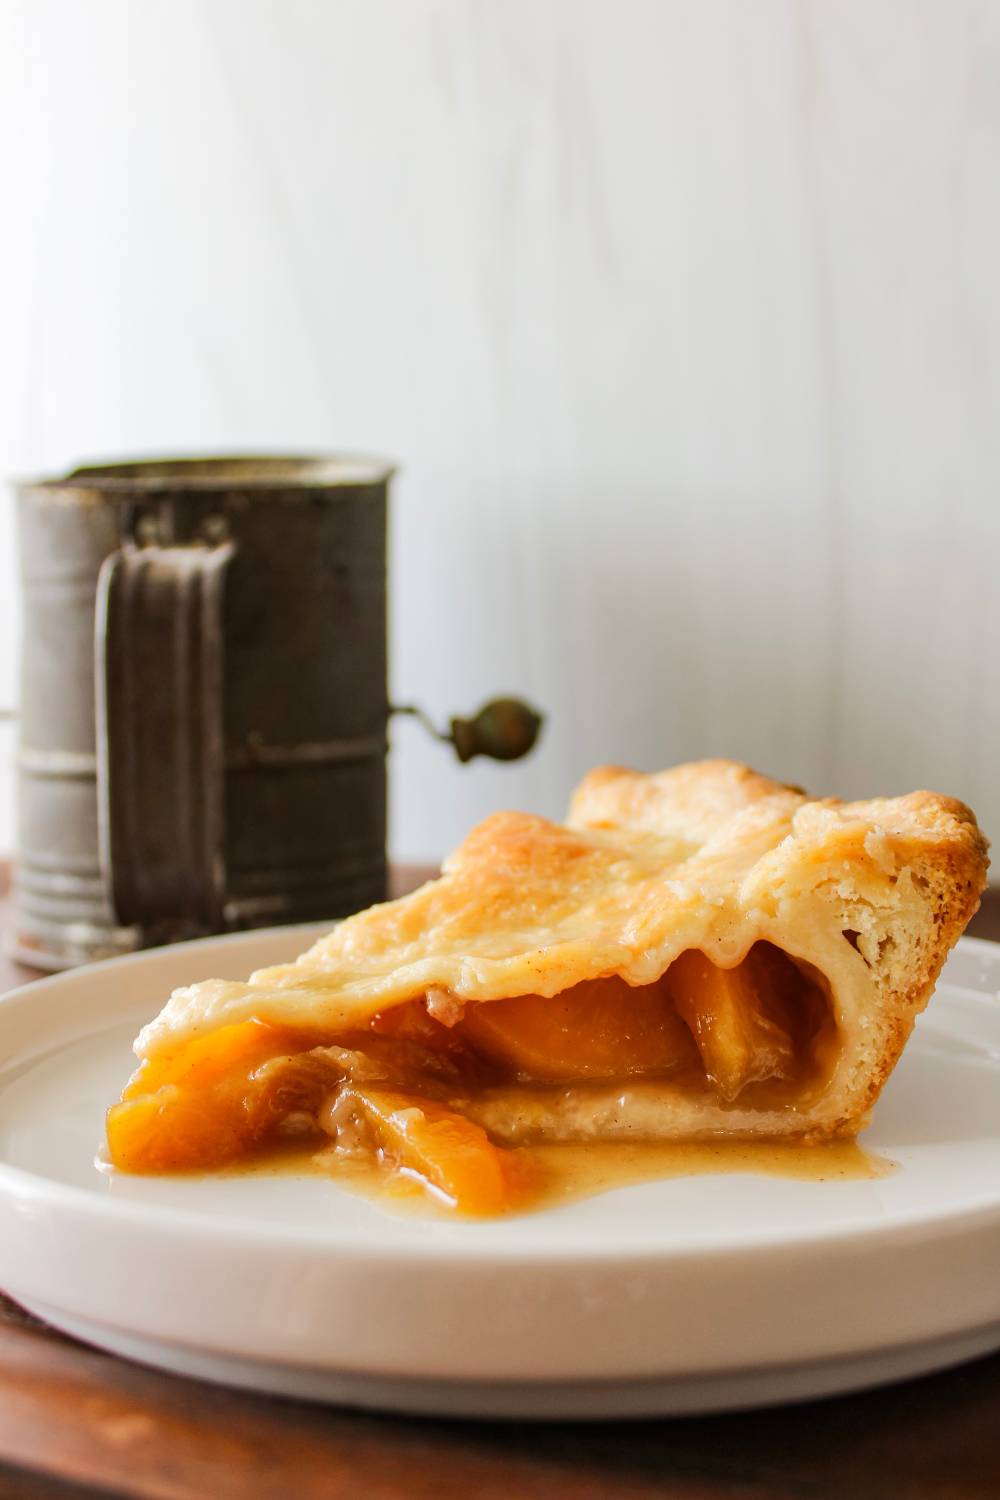
Peach Pie with Homemade Pie Crust (fresh or frozen peaches)
This homemade peach pie is made with a buttery flaky pie crust and filled with sweet peaches. It is really easy to make and is the perfect summer pie recipe!
Nothing says summer like fruit pies on a warm day! I love using fresh fruit from my garden or the farmers market to make a homemade pie, like my Tart Cherry Pie recipe. This peach pie recipe can be made with fresh peaches during the middle of summer, or you can enjoy it year-round with frozen peaches! Both methods will yield a delicious and amazing peach pie!
This peach pie recipe is a special one because peach pie was the very first pie recipe I ever made! My Grandma requested one for her birthday one year, and instead of buying one, I decided I wanted to learn how to make one from scratch! I was honestly a little intimidated, but I think my determination overpowered that. Not only does homemade pie just taste better, but it is also made with simple ingredients! Now my Grandma gets a homemade peach pie every year on her birthday!
The problem with store-bought pie crust
Sure, the store-bought stuff is convenient, but if you take a look at the ingredients, you will see a long list of ingredients, many of which are just preservatives and harmful chemicals. Unfortunately, many of these ingredients are harmful to our health and should be avoided. This homemade pie crust recipe only uses four simple ingredients and comes together quickly and easily! I promise once you start making this recipe you’ll never go back to the store-bought stuff again!
The key to a good pie crust
The most important thing when making pie crust is to keep the butter very cold. This is what gives pie crust a super flaky texture! You will want to freeze the butter for at least 15 minutes before assembling it to ensure that the butter stays cold. Then, you will chill the pie crust before actually putting the pie together. Do not skip any of the steps! Trust me, it is worth the wait.
How to crimp the edges of the pie crust
In my opinion, THE hardest part about making pie is crimping the edges. I don’t know what it is, but I just can’t seem to make it look pretty. I honestly held off from sharing my pie recipes because I couldn’t crimp pretty edges, but let that be a lesson to you… pies do not have to look perfect in order to taste amazing!! And don’t be afraid to get started. I promise a homemade pie with a little wonky edges will always taste better than store-bought! And plus, I think it just gives it a little character. I think “rustic” is the proper term here!
This video is a really great resource to see how to crimp the edges.
Tools to make a Homemade Peach Pie
- Kitchen Scale- The easiest way to measure the flour is with a kitchen scale. This ensures you have the exact amount needed.
- Food processor – Instead of using your hands or a pastry blender, a food processor makes assembling the pie dough so easy! This is the food processor I have, I love it because it doubles as a blender!
- Rolling Pin – to evenly roll out the dough
- Pie Pan – you can use any 9-inch pie pan, but I love this one by Pyrex!
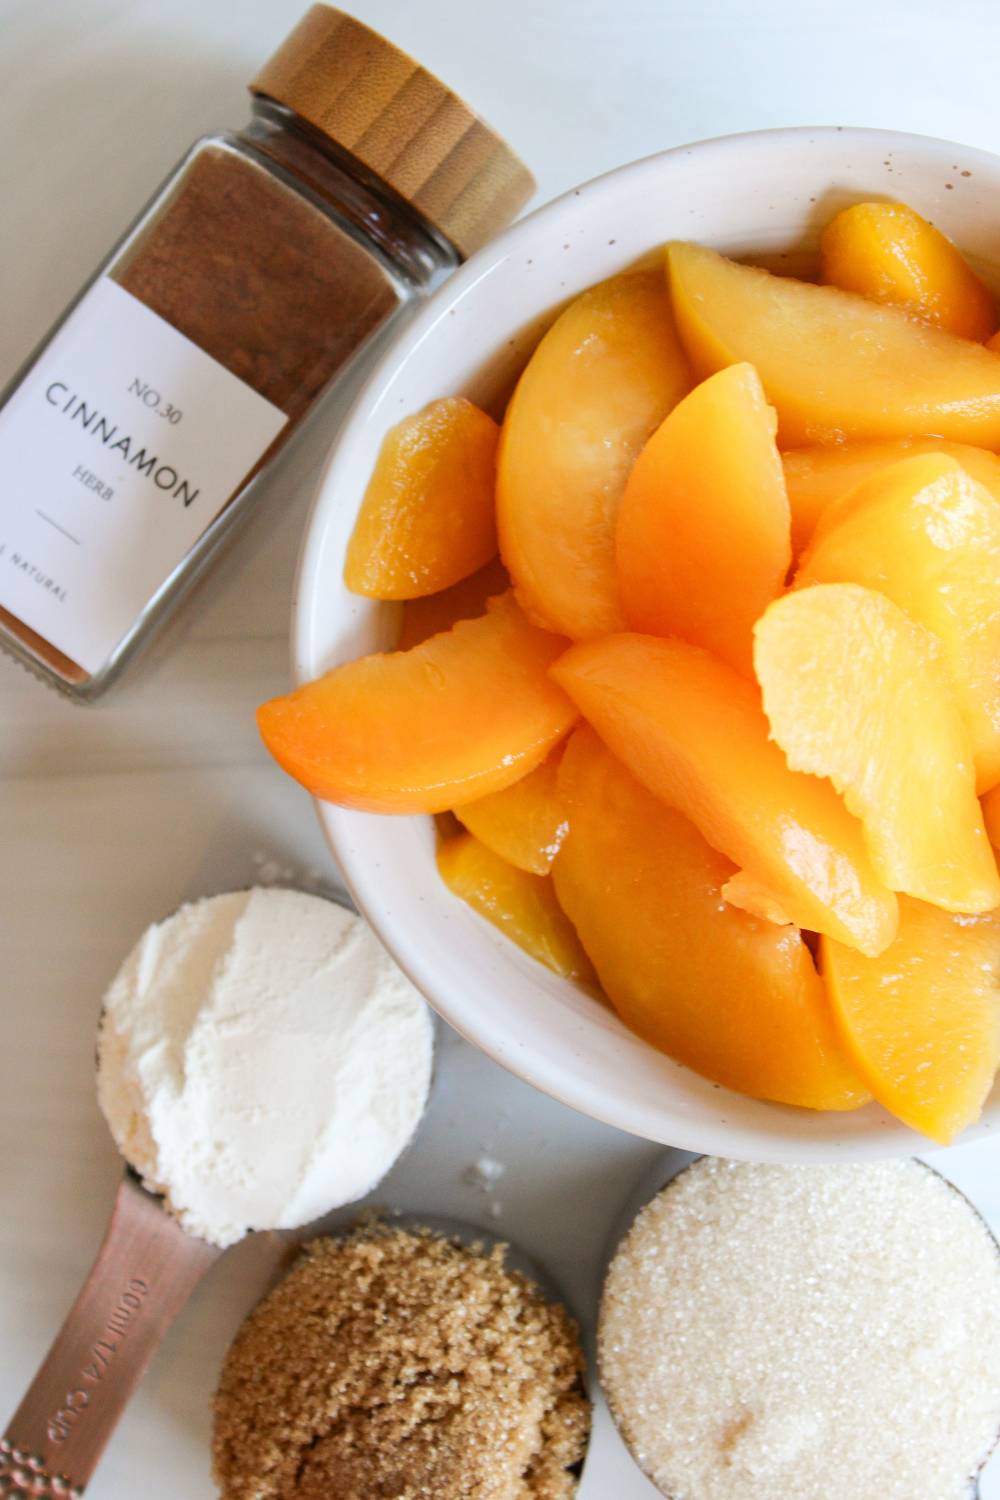
Ingredients for the peach pie
Pie Crust ingredients
- Butter – For pie crust, I use unsalted butter. You will need to make sure it is very, very cold for a flaky crust. So do not skip that step!
- Salt- I use Redmond Real Salt.
- Flour- I use unbleached, all-purpose flour
- Water- You will need ice-cold water. Either use water that has ice cubes in it or get water from the refrigerator that is very, very cold to keep the butter at the right temperature.
- Egg- you will brush the top of the pie with an egg wash to promote a golden brown color.
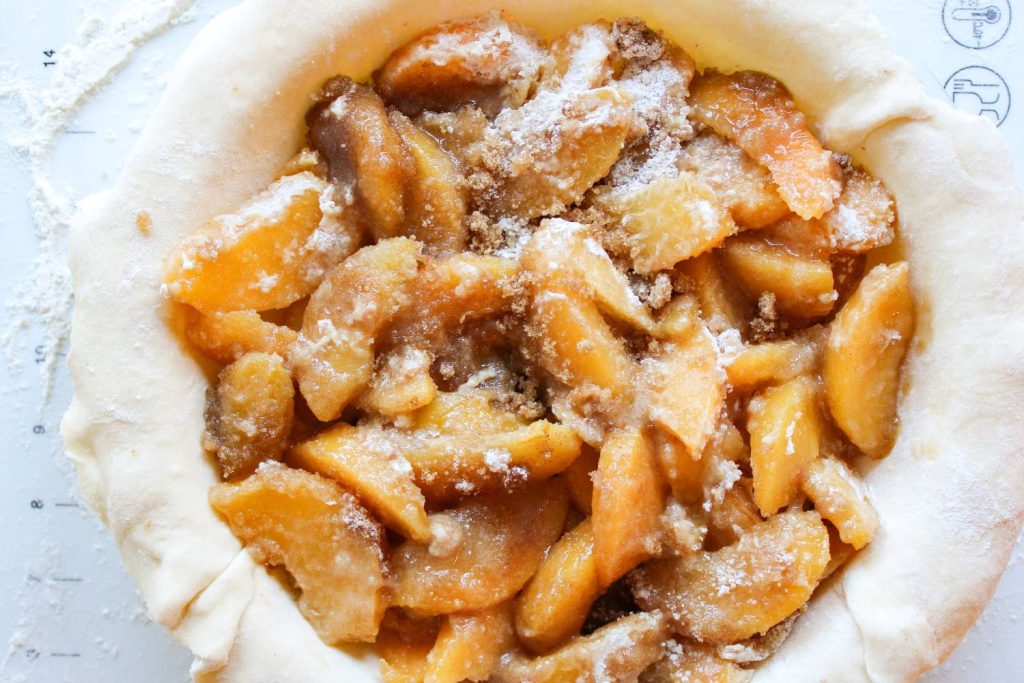
Peach filling ingredients
- Sliced peaches- you can use fresh or frozen. If you are using fresh peaches slice and remove the peel. See note below for frozen peaches.
- Brown sugar – the brown sugar adds a really nice flavor to the pie
- Sugar- I like to use cane sugar rather than regular white sugar because it is less processed.
- Lemon juice- to balance out the sweetness.
- Cinnamon- A hint of cinnamon pairs so well with the peaches and brown sugar.
- Flour- Unbleached all-purpose flour to thicken the filling.
Instructions for using frozen peaches
I always make this pie with frozen peaches because they are super easy to use and you do not have to slice up fresh peaches. I get frozen sliced peaches from a local farm that grows them so I get to enjoy them year-round instead of just during peach season! An important step for using frozen peaches however is to let them thaw first. Frozen peaches will release more liquid than fresh. If you do not let them thaw first you will have a runny pie! (But even if you do it will still taste great!) I’ve tried making this recipe without thawing and adding more thickener, but it just doesn’t work the same.
To remove the excess liquid, thaw peaches and then strain out the liquid. I find the best way to do this is to just use a big strainer on top of a large bowl and let the juice drip out as it thaws.
Step-by-step instructions to make Homemade Peach Pie
To make the pie crust:
First, cut the butter into cubes and add to the freezer for 15 minutes. This is an important step to make sure that the butter stays cold.
Next, add the flour, salt, and cold butter to your food processor. I recommend measuring out your flour using a kitchen scale so that you can ensure exact measurements. Pulse until it resembles coarse sand.

Take your cold water, add about 1/3 of it to the mixture, and pulse. Repeat again with another 1/3 of the water, and then again with the remainder. At this point, the pie crust should pull away from the sides and start to form a ball. If it still hasn’t done this, add 1 more tablespoon of water at a time until it pulls away from the sides.
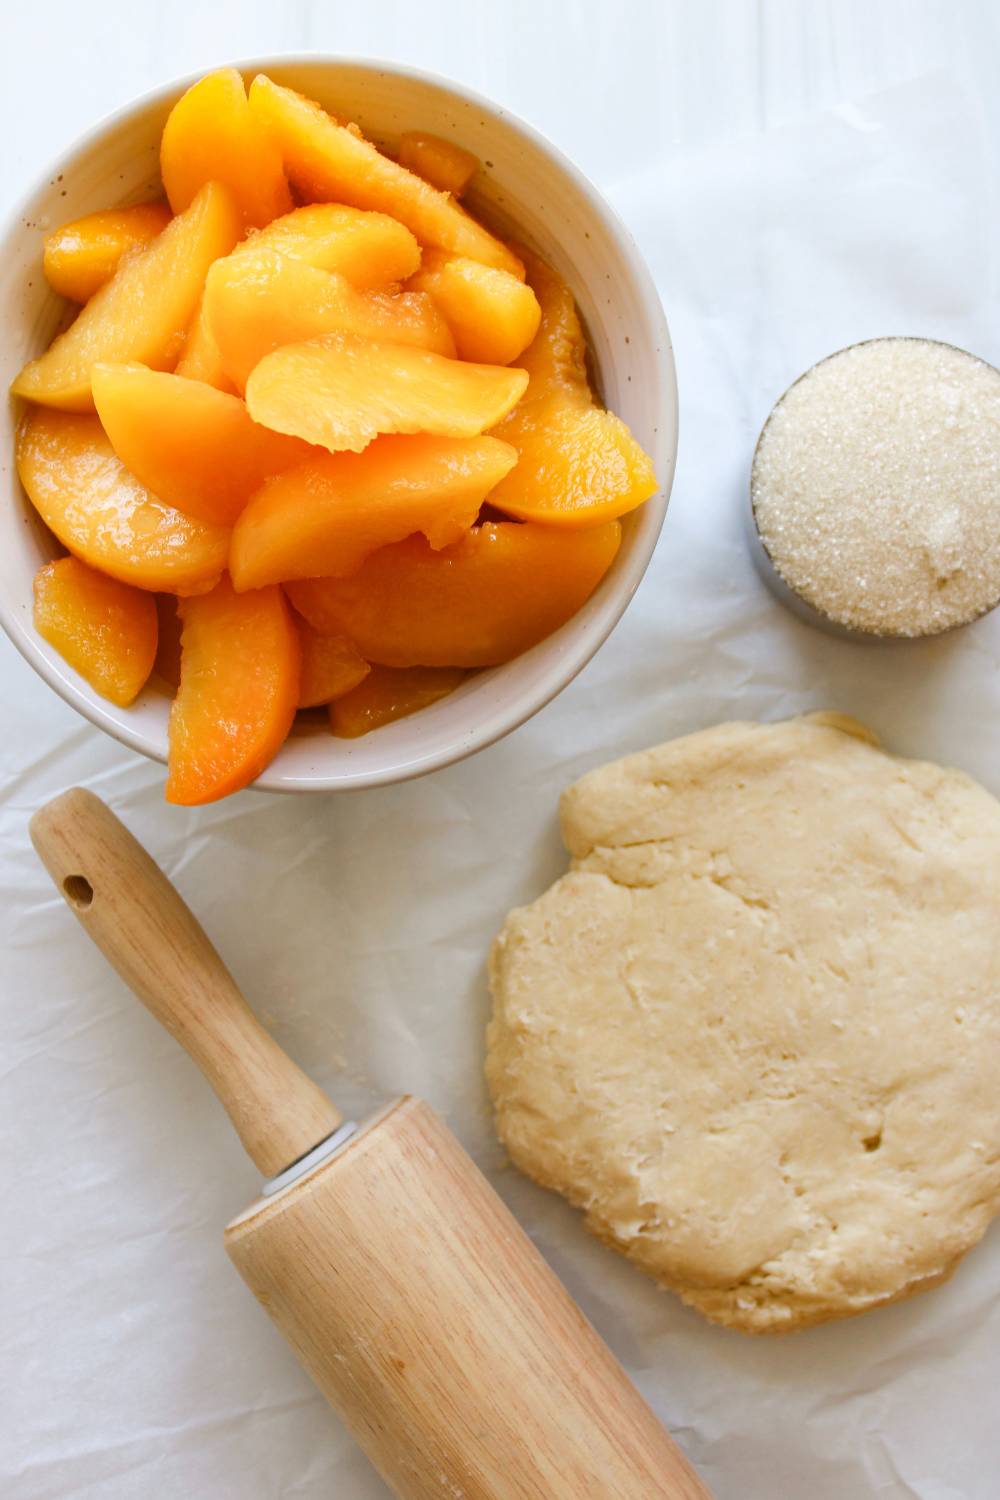
Remove the dough from the food processor and push it together fully using your hands. Divide the dough into two equal parts and form it into a small disk shape. Cover the dough with plastic wrap and refrigerate for at least one hour. DO NOT skip this step because it helps ensure that the butter stays really cold which is crucial for a flaky pie crust.
To make the peach filling:
Add all of the peach filling ingredients to a bowl and stir to evenly coat the peaches. If you are using frozen peaches see note.

To assemble the pie:
Preheat your oven to 400 degrees.
Remove the dough from the fridge and let it sit for a couple of minutes so it will soften a little bit to make it easier to roll out.
Add the dough to a lightly floured surface, and roll out using a rolling pin that has also been lightly coated in flour. Roll the dough out into a circle until it is about 12 inches in diameter. You want the dough to be bigger than the pie pan.
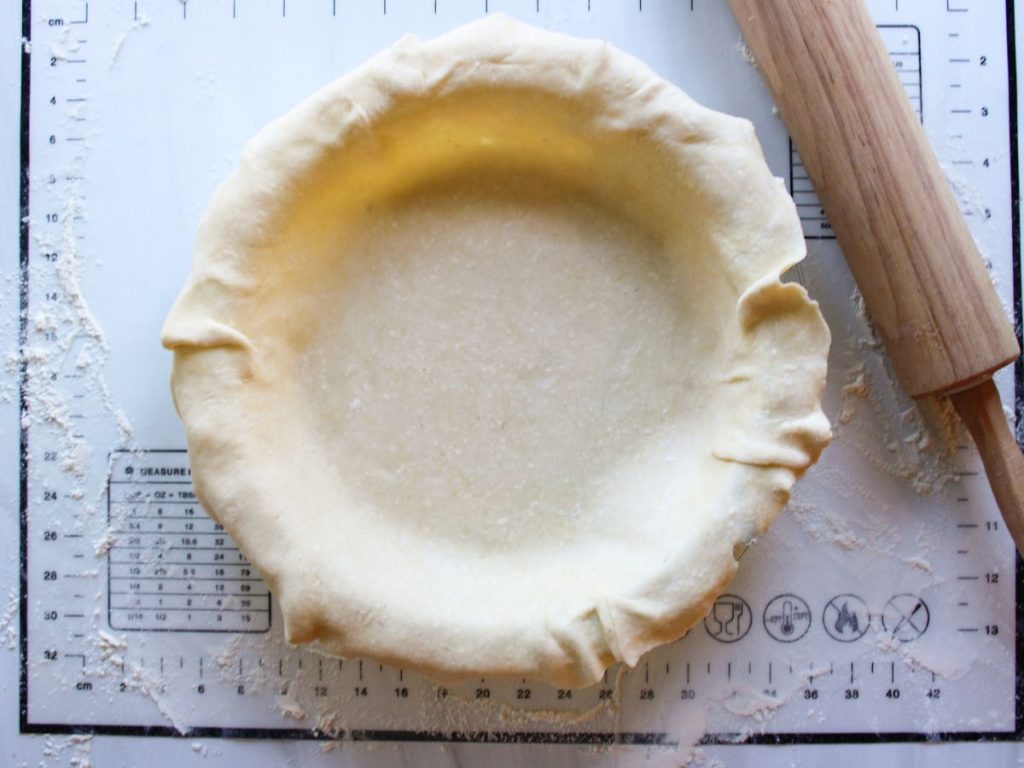
Using your rolling pin, lift the dough up and wrap it around the rolling pin and then transfer it to the pie pan, pressing it to the bottom and the sides of the pan.
Add the peach mixture over the bottom crust in the pie dish.
Repeat the process for the second crust. Roll out the dough and then add on top of the pie.
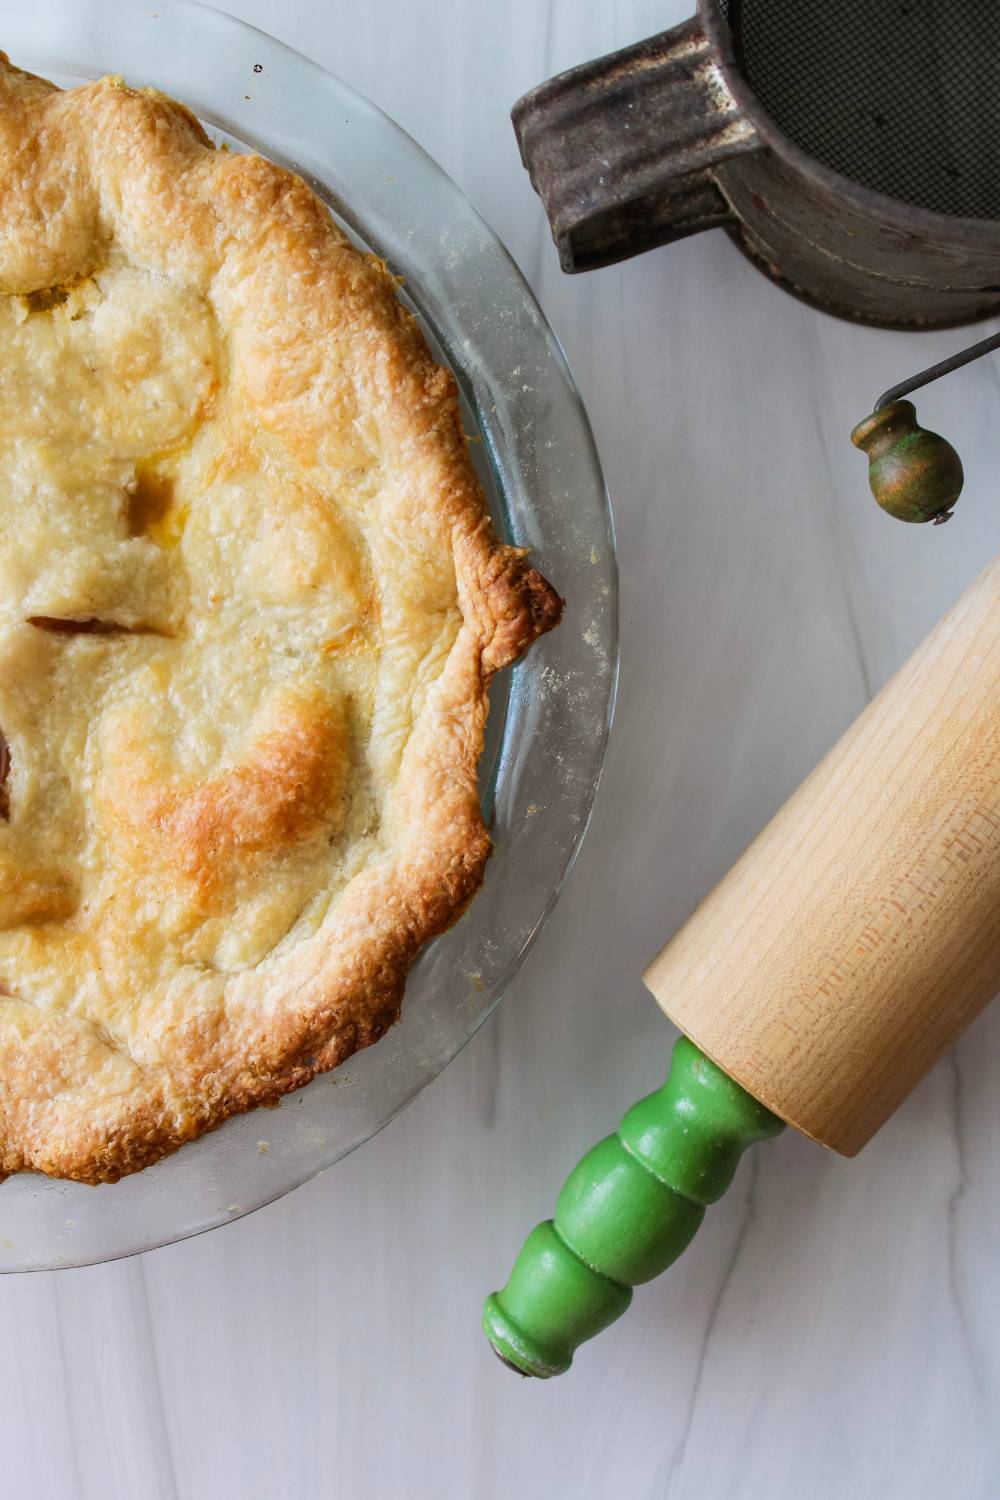
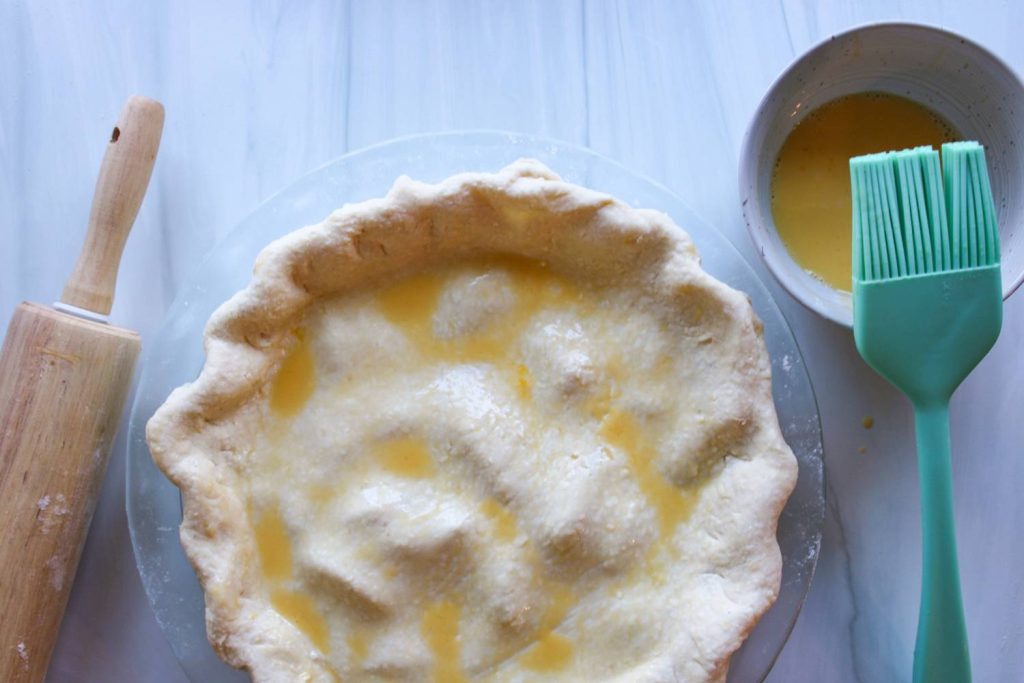
Cut the excess pie dough off on the outside of the crust. Then, tuck the edges of the top crust underneath itself to seal it up, and then crimp the edges.
Add one egg and one tablespoon of water to a small bowl and whisk to combine. Brush the egg wash on top of the pie crust. Add 4 cuts to the center of the pie crust on top for vents to allow steam to exit the pie while baking.
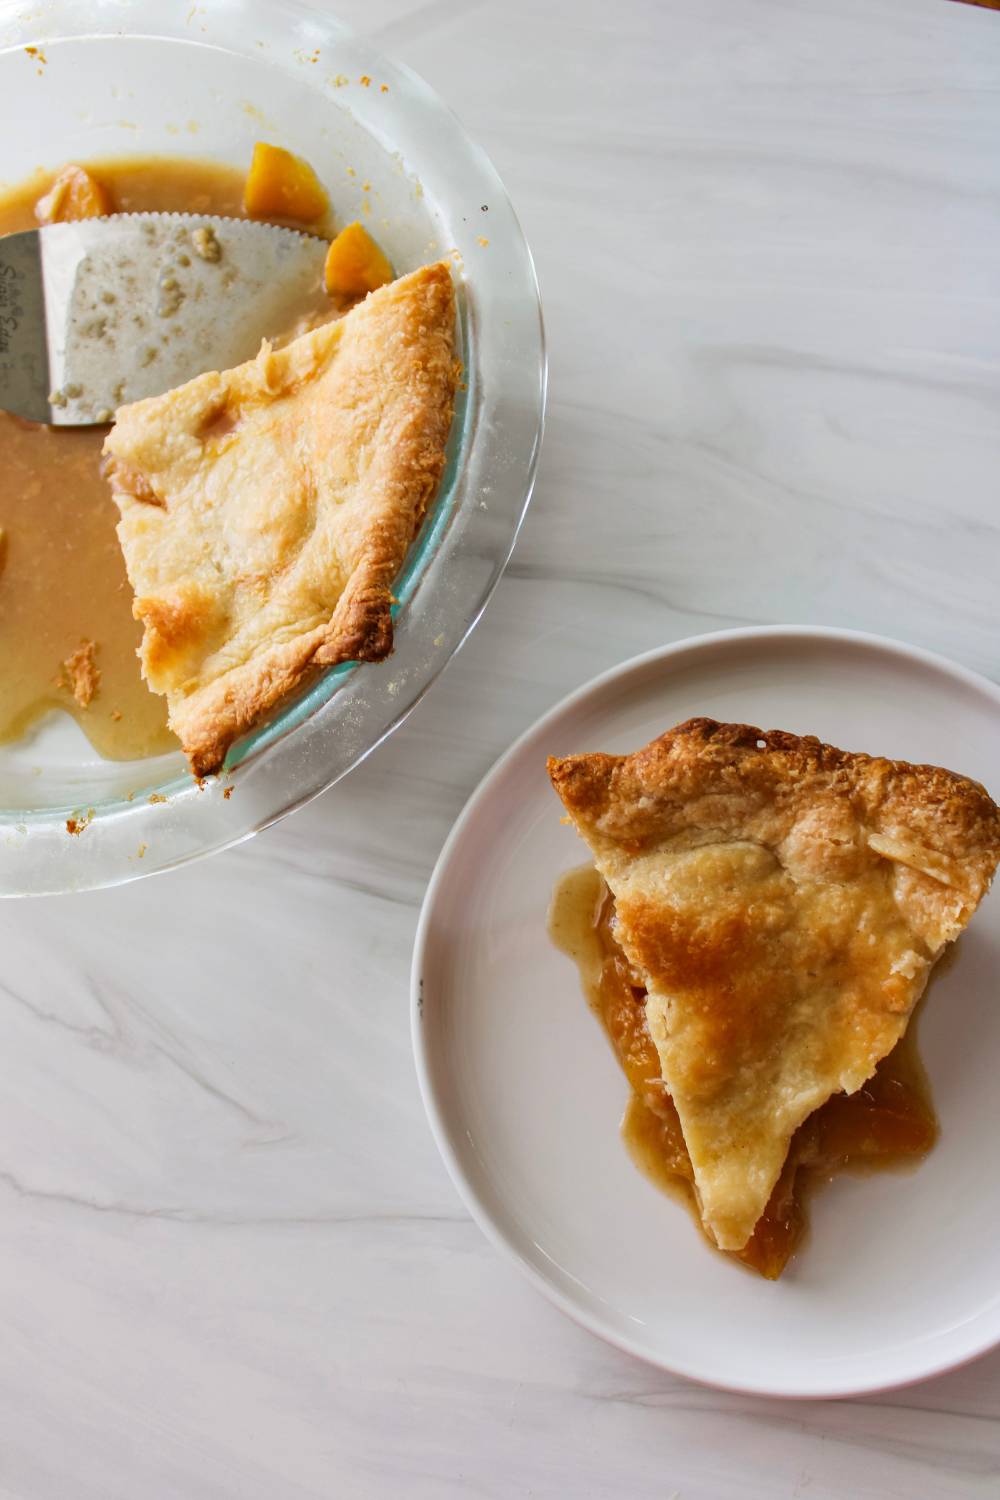
Add the pie to the preheated oven on the middle rack and bake for 35-45 minutes, or until the crust is golden brown and the peach filling is bubbling. Check the pie halfway through and if the edges are becoming too brown you can tent the edges with strips of foil.
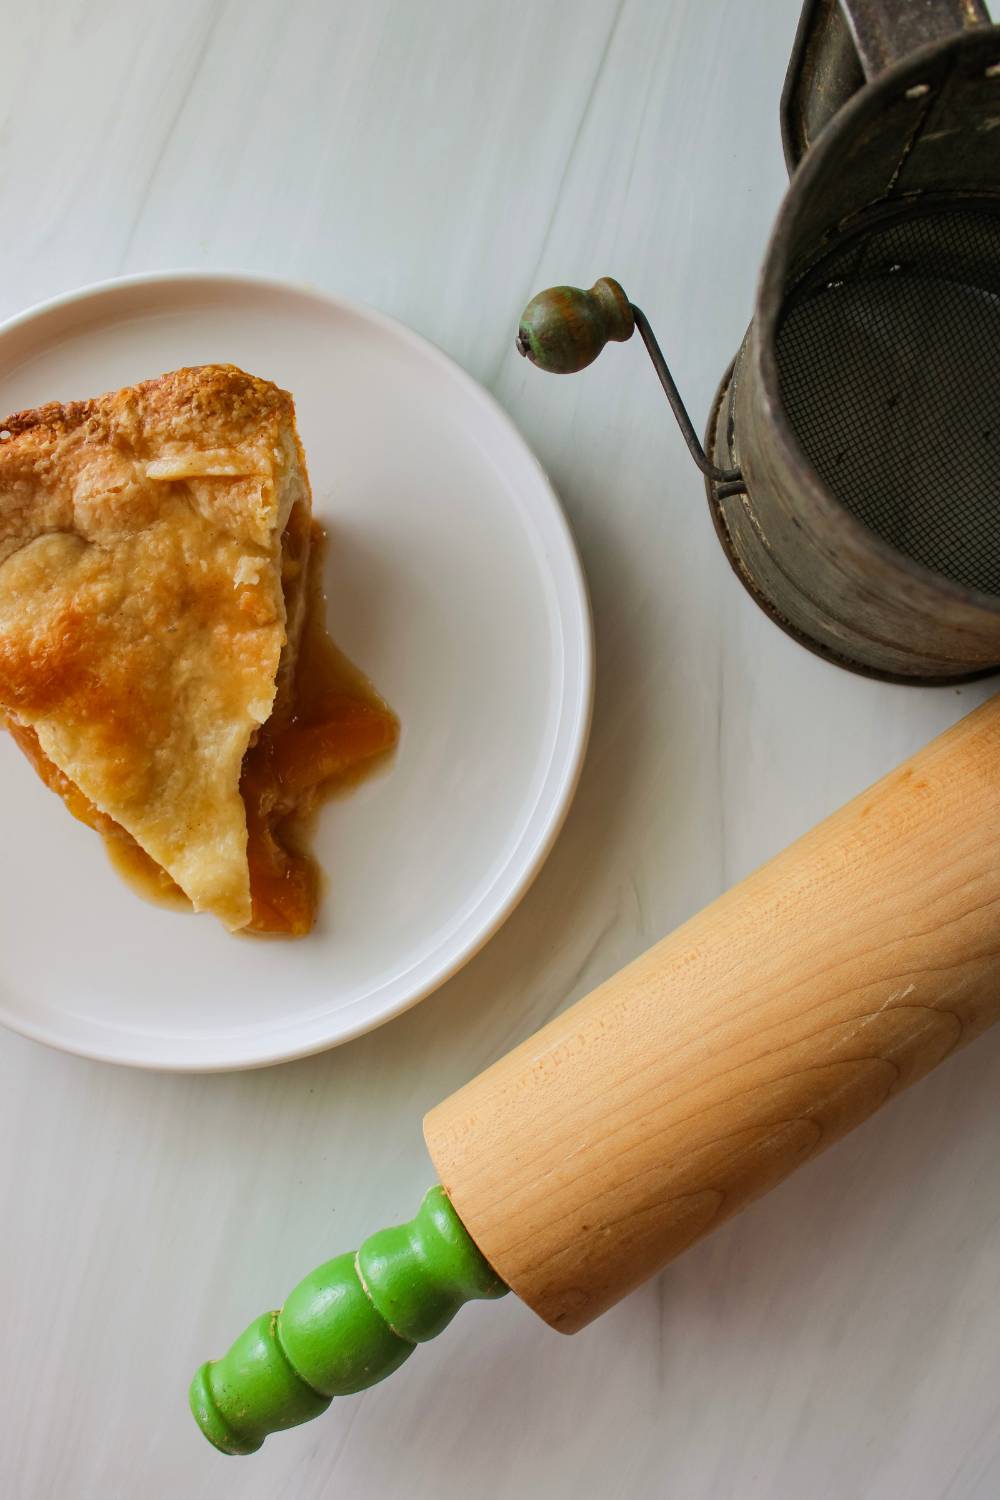
Let the pie cool for at least 30 minutes before cutting into it. The longer the pie cools, the thicker the filling will be. Add a scoop of vanilla ice cream on top if desired and enjoy!

How to store homemade peach pie
You can store the pie at room temperature for two days, or if stored in the fridge it will last for up to 4-5 days. Be sure to cover it with plastic wrap or add it to an airtight container.

Peach Pie with Homemade Pie Crust
Ingredients
Pie Crust
- 1 cup unsalted butter 2 sticks
- 2 ¼ cups all-purpose flour 290 grams
- 1 teaspoon salt
- ½ cup ice cold water Plus 1-2 T more
- 1 Egg
Peach Filling
- 5 cups sliced peaches see note
- 1/2 cup brown sugar
- 1/2 cup sugar
- 1 tbsp lemon juice
- 1/4 cup flour
- 1/4 tsp cinnamon
Instructions
To make the pie crust:
- Cube the butter and then add to the freezer for 15 minutes.
- Add the flour, salt, and cold butter to your food processor and pulse until it resembles coarse sand.
- Take the cold water, add about 1/3 of it to the mixture, and pulse. Repeat again with another 1/3 of the water, and then again with the remainder. At this point, the pie crust should pull away from the sides and start to form a ball. If it still hasn't done this, add 1 more tablespoon of water at a time until it pulls away from the sides.
- Remove the dough from the food processor and push it together fully using your hands. Divide the dough into two equal parts and form it into a small disk shape. Cover the dough with plastic wrap or parchment paper and refrigerate for at least one hour.
To make the peach filling:
- Add all of the ingredients into a bowl and toss to evenly coat the peaches.
To assemble the pie:
- Preheat the oven to 400 degrees.
- Remove the dough from the fridge and let it sit for a couple of minutes so it will soften a little bit to make it easier to roll out
- Add the dough to a lightly floured surface, and roll out using a rolling pin that has also been lightly coated in flour. Roll the dough out into a circle until it is about 12 inches in diameter. You want the dough to be bigger than the pie pan.
- Using your rolling pin, lift the dough up and wrap it around the rolling pin and then transfer it to the pie pan, pressing it to the bottom and the sides of the pan.
- Pour the peach pie filling into the pie pan and spread it evenly.
- Repeat rolling the second dough out and add to the top of the pie for the top crust.
- Cut the excess pie dough off on the outside of the crust. Then, tuck the edges of the crust underneath itself to seal it up, and then flute the edges.
- Add one egg and one tablespoon of water to a small bowl and whisk to combine. Brush the egg wash on top of the pie crust. Add 4 cuts to the pie crust on top for vents to allow steam to exit the pie while baking.
- Add the pie to the preheated oven on the middle rack and bake for 35-45 minutes, or until the crust is golden brown and the filling is bubbling. Check the pie halfway through and if the edges are becoming too brown you can tent the edges with foil.
- Let the pie cool for at least 30 minutes before cutting into it. The longer the pie cools, the thicker the filling will be.
Notes
Nutrition
This post may contain affiliate links, which means I make a small commission at no extra cost to you. As an Amazon Associate, I earn from qualifying purchases. See my full disclosure here. I only share products that I use and love.


This peach pie is incredible! The pie crust is so easy to make and is so much better than anything you buy from the store. Will be making this again!